During the 1960’s and 70’s, Guild jumbo body 12 strings were legendary for their sound and rock steady build. The top of the line was the F-512, with a spruce top and rosewood sides and back. Next model down was the F-412, which had the same specs as the 512, but with maple sides and back. There was a third option in the jumbo line, which was an upgrade version of the F-212, which had a smaller jumbo shaped body with mahogany sides and back. If you are familiar with Guild, then you know that the sound of their mahogany guitars is something special. They did not have the bling detailing of their rosewood and maple cousins, but they could blow the doors off most any other comparable instrument on the market. The upgrade version was the F-212XL, which was the same size and structure as the 512 and 412, minus bling, with mahogany back and sides. They were cheaper then, and for some strange reason, the vintage models today are still cheaper than the 412 and 512, but the sound and performance lack nothing in comparison.
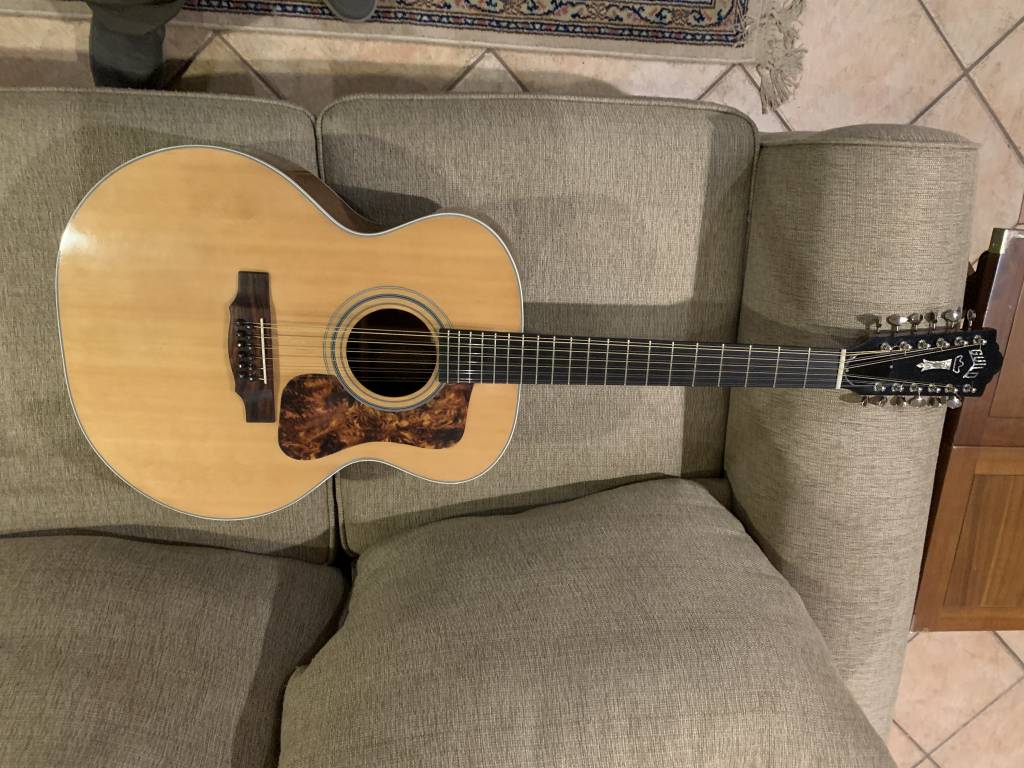
This 1973 F-212XL showed up on Ebay for under $600. The average sale price for one of these in average condition is about $1750, which made it a good candidate for extensive repair. The seller noted a top crack next to the fretboard, but no other specific damage. The pictures appeared to show high action, and it looked as though the bridge had been shaved down, so I suspected a need for a neck reset and a bridge replacement. I had not done a neck reset before before on any guitar, but I had been researching how to do them for quite a while. I had successfully removed and replaced several bridges on different high end guitars, but the difference here was that I would have to make the new bridge, because there were no replacements for sale anywhere for old Guild 12 strings. Two things were consistent in all that I read, that Guild guitars were very difficult to do neck resets on, and that 12 strings were more difficult than 6 strings. So if I could successfully reset the neck on this guitar, I could probably tackle anything else that needed this. I ordered a rosewood blank to make the bridge, figuring I would cross that bridge (no pun intended) when I got to it. When the guitar arrived, the action at the 12th fret was close to 3/8″, and the bridge was shaved down to an average of 3/16″, which pointed definitely to a neck reset and a new bridge.
Typically, most repair shops have used steam under pressure to melt the glue on the dovetail joint in order to remove the neck. The obvious drawback to this method is the introduction of large amounts of water into a wooden instrument that is usually at least 25 years old, which is never a good idea for any other reason. A newer technique was developed by Stewart-McDonald, a company that has designed and sold luthier tools for years. This method uses a heated copper rod to melt the glue, eliminating the threat from water. The rods are connected to specific models of soldering irons to produce the heat. At first, I set up a steam rig with a pressure cooker and some high heat hose with a 1/16″ diameter brass tube in the end. After several attempts to create the flow of steam, and then regulate it, I set this apparatus aside and ordered the heat rod and soldering station. Someday when I have more time, I will do more research on the steam process. I regret that I never took any good before pictures of this guitar, so the pictures in this post are all from the actual repair process.
The first two operations on this guitar were removal of the pickguard and the bridge. The pickguards on Guilds and Martins of this era were glued directly to the wood before lacquer with a rigid glueline. Google “Martin pickguard crack” for more detail as to why this was not a good idea. As the guitar ages, the wood moves and so does the plastic, but not in the same direction or at the same rate. The plastic actually shrinks with age as it continues to lose solvent, while the wood maintains its dimension. This actually starts to create a concave area on the soundboard, and eventually it will crack the sound board. This guitar was dished out under the guard, but it had not cracked yet. I removed the guard by heating it with a hairdryer to soften the glue, and sliding an offset palette knife under it as i went. It came off cleanly with very minor chipping of the top. I removed the spruce chips from the pickguard and super-glued them back in place on the top.
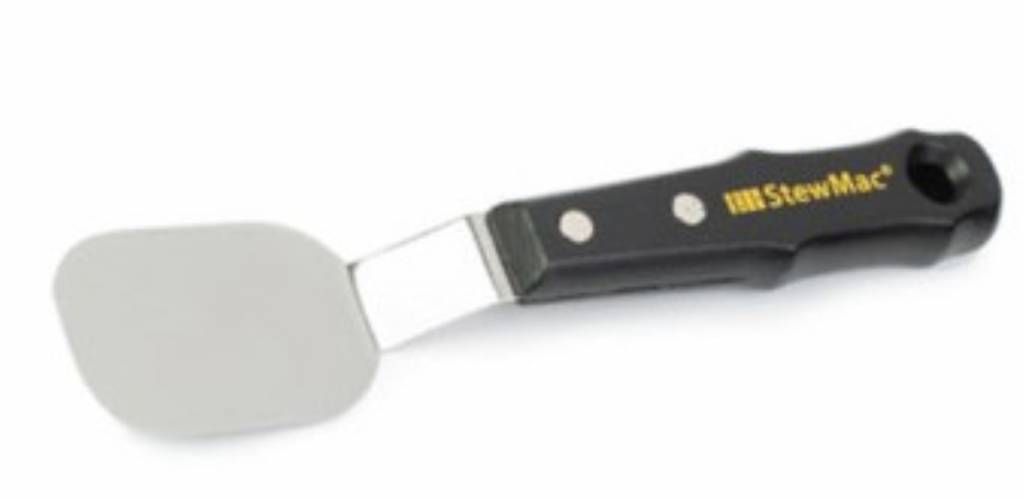
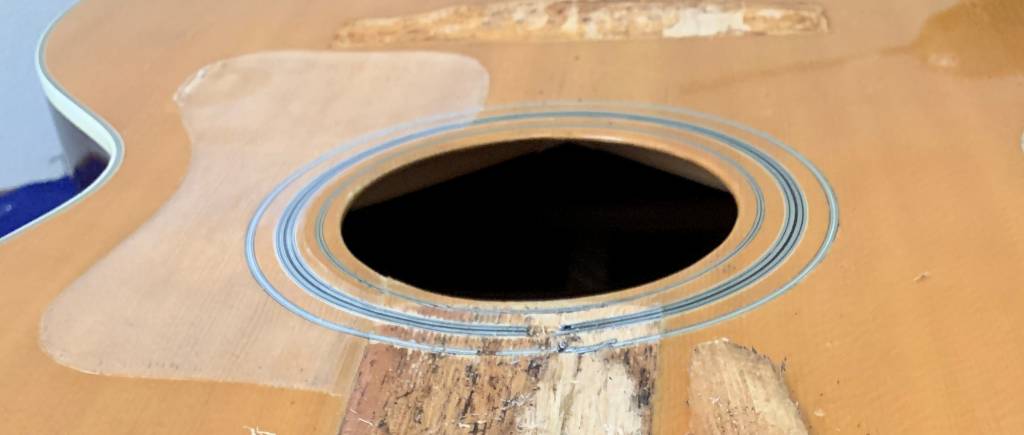
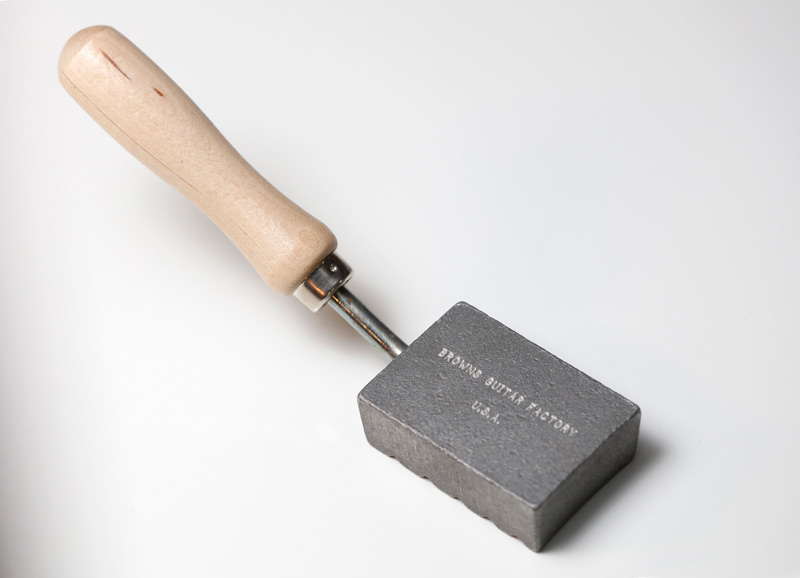
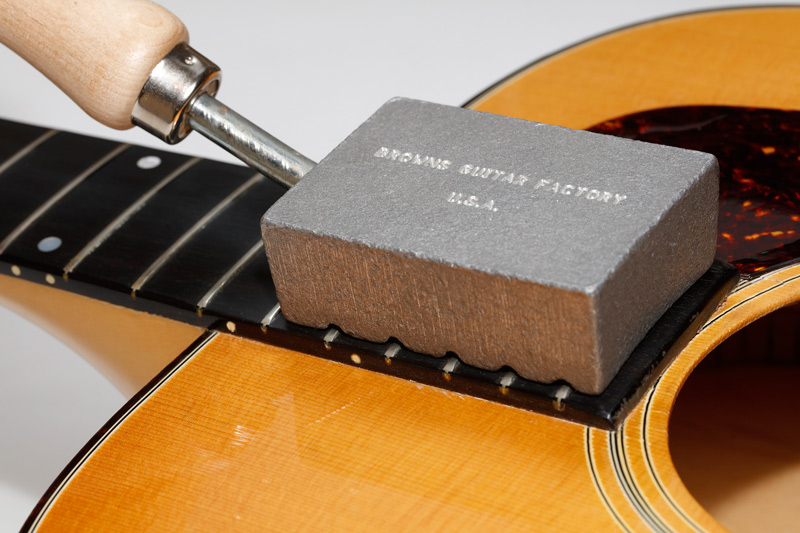
To remove the bridge, I used a specially designed heating iron made of aluminum. I heated the iron on a small hotplate to 250 degrees, using an infrared thermometer for accuracy. The end of the iron and one side are curved the match the top of a Martin bridge, which also works well for Guild, I simply rested it on top of the bridge, moving from one end to the other. As the glue began to soften, I used the spatula pictured above to separate the bridge from the top. Patience and gentleness are key here. Also, I worked from the back and from the front to avoid digging into the top at the bridge pin holes. The removal was very clean, and again, I removed the small chips of spruce from the bridge and reglued them to the top.
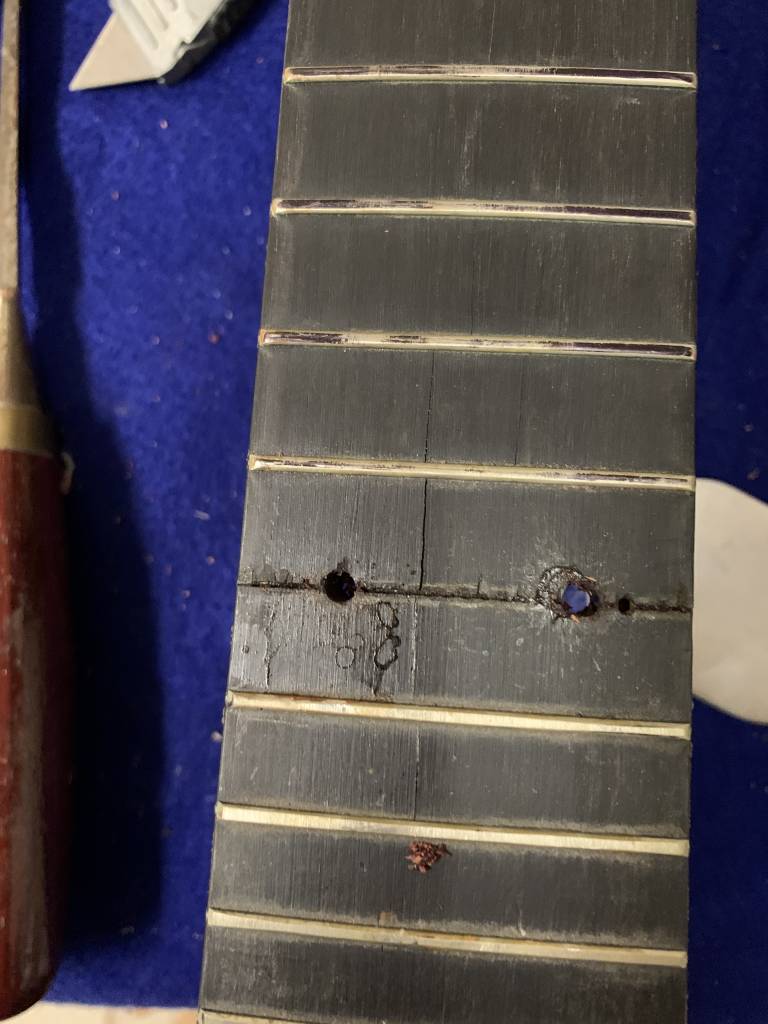
This is where the real work began. A neck reset involves several steps which all must be done correctly to avoid damaging the neck or the body. The first step is to remove the first fret after the fret where the neck meets the body, which was the 15th fret on this guitar. This fret sits right above the hollow space at the rear of the dovetail joint that holds the neck to the body, which is precisely where you want to apply the heat rod to melt the glue. With the fret removed, I drilled two angled holes at the approximate edge of the dovetail pocket right through the fret slot. If your position is right, you will hit air just below the finger board. I drilled a 3/32″ pilot hole first, then enlarged it to 9/64″ for the 1/8″ rod. You never drill in the center, because you will hit the truss rod if you do. The jumbo Guild 12 strings have 2 truss rods, so you have to allow enough room to miss them. I removed the cover on the headstock to get an approximate idea of how big the space needed to be.
The next step was to free the finger board extension from the body of the guitar so it could come off with the neck. I used the same heating iron and spatula that I had used for the bridge to do this. The widest side of the iron is slotted to closely match the fret spacing on the fingerboard extension, and curved to approximate the radius of a Martin fretboard. I heated the iron the same way as for the bridge, and starting at the soundhole, I used the spatula to slide under the fret board as the glue softened. I continued this process all the way to the 15th fret. The last fret section of the fingerboard would come loose with the neck.
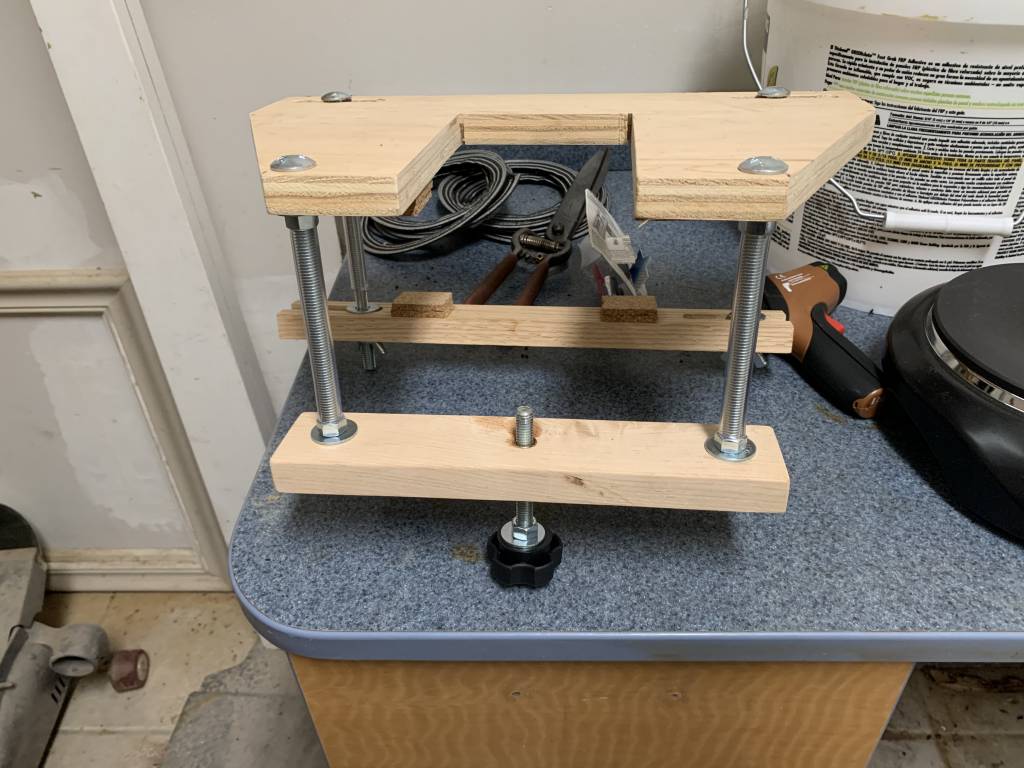
Once the fretboard extension was loose, I inserted the rod into the soldering iron, and turned the heat up to 800 degrees, and began inserting it in the two holes for about 5 minutes at a time, moving back and forth between the holes. This is the big advantage of a professional soldering station, that you can control the heat very accurately. Stewart-Mcdonald makes a wooden jig which is designed to apply pressure to the end of the neck heel, pushing it straight up. Rather than buy their version, I made one in my shop, and changed a few design elements to make it easier to use. I also used a hypodermic glue needle to inject a small amount of water into the holes just before inserting the rod, which creates a small controlled amount of steam.
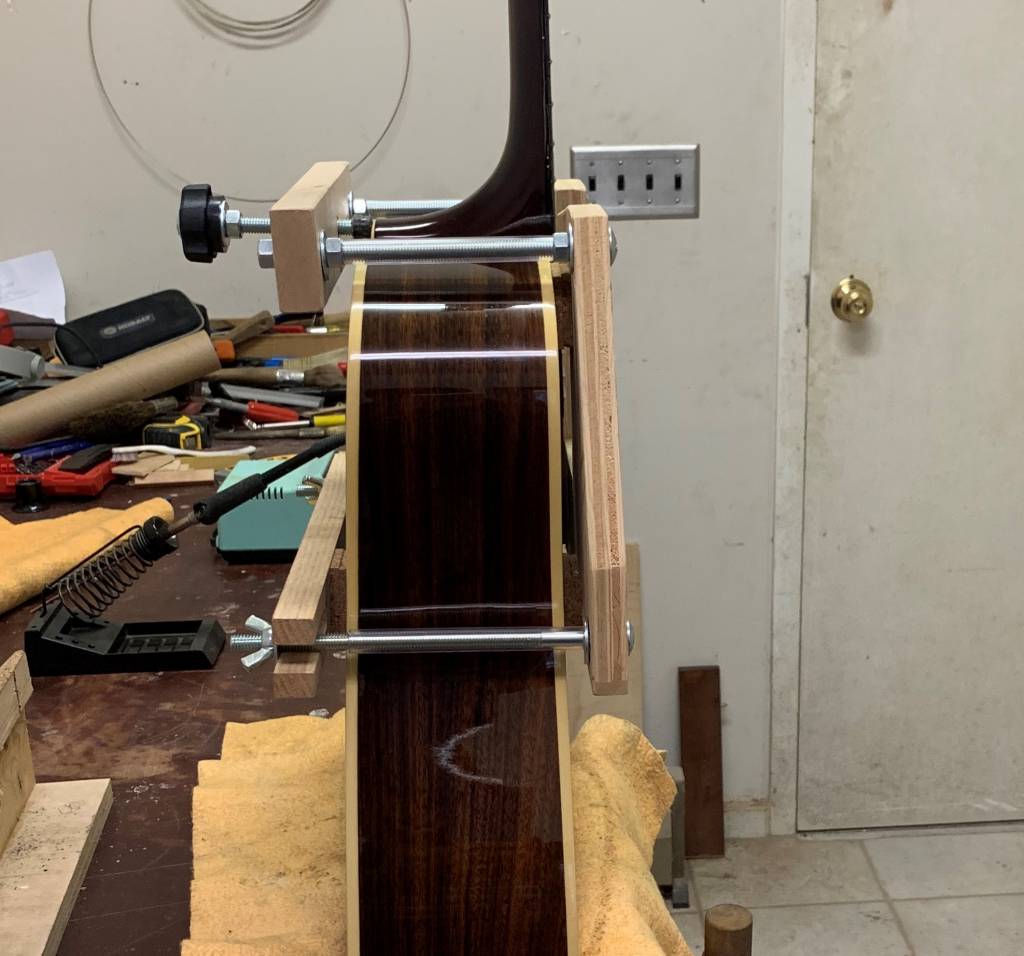
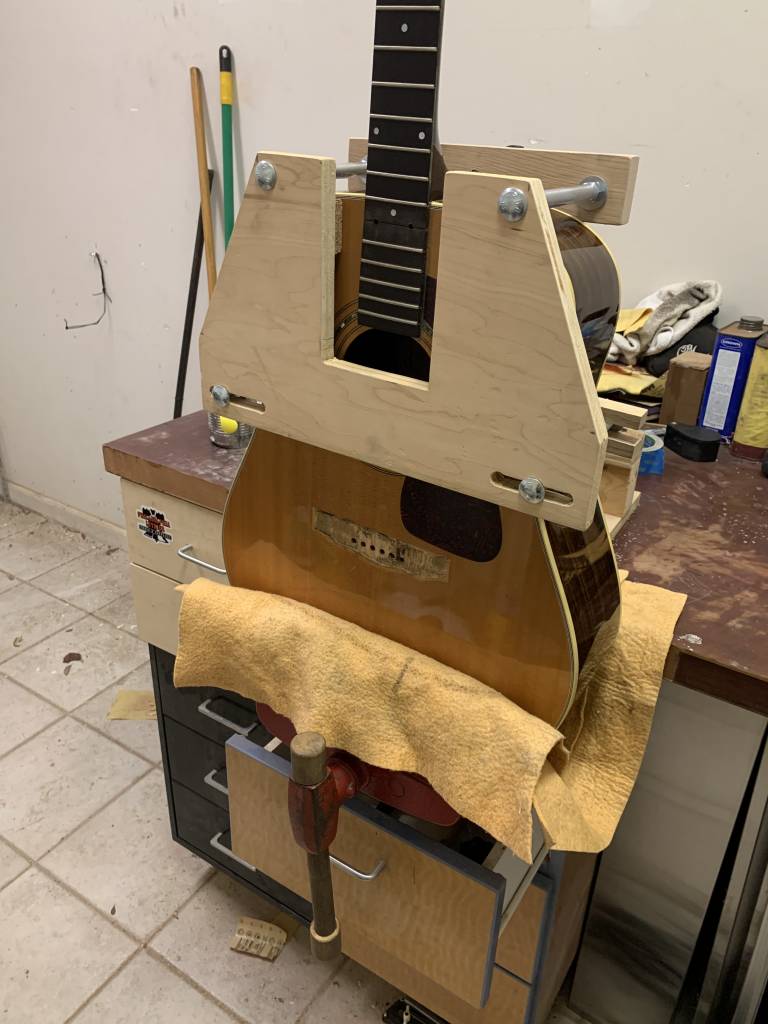
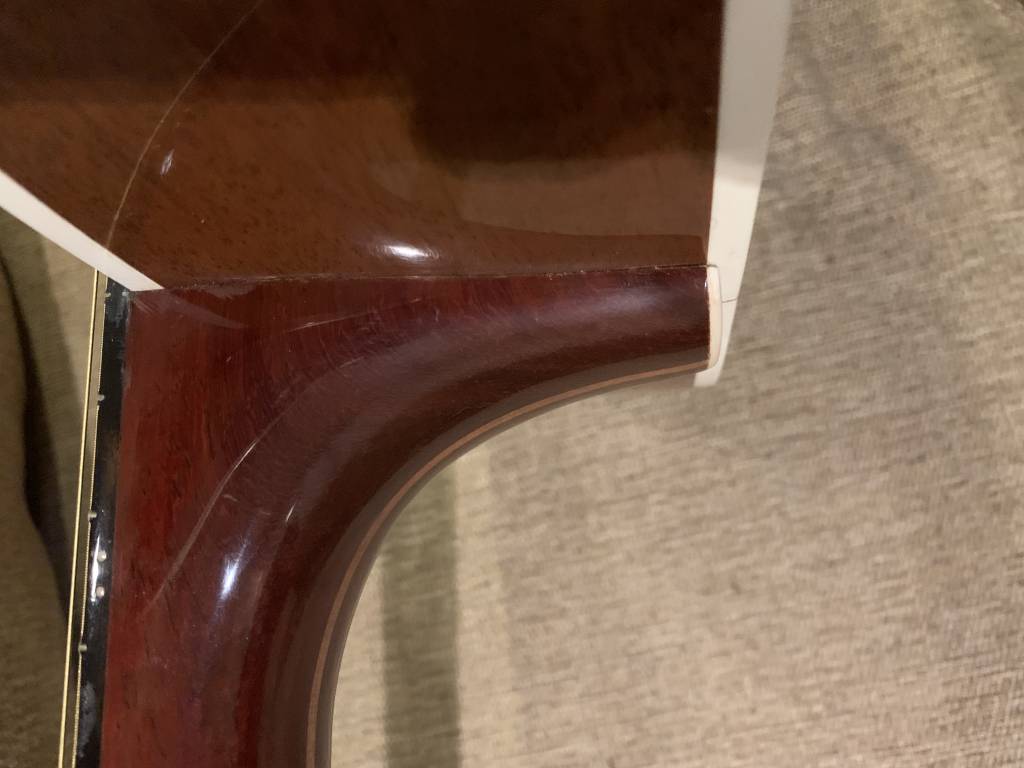
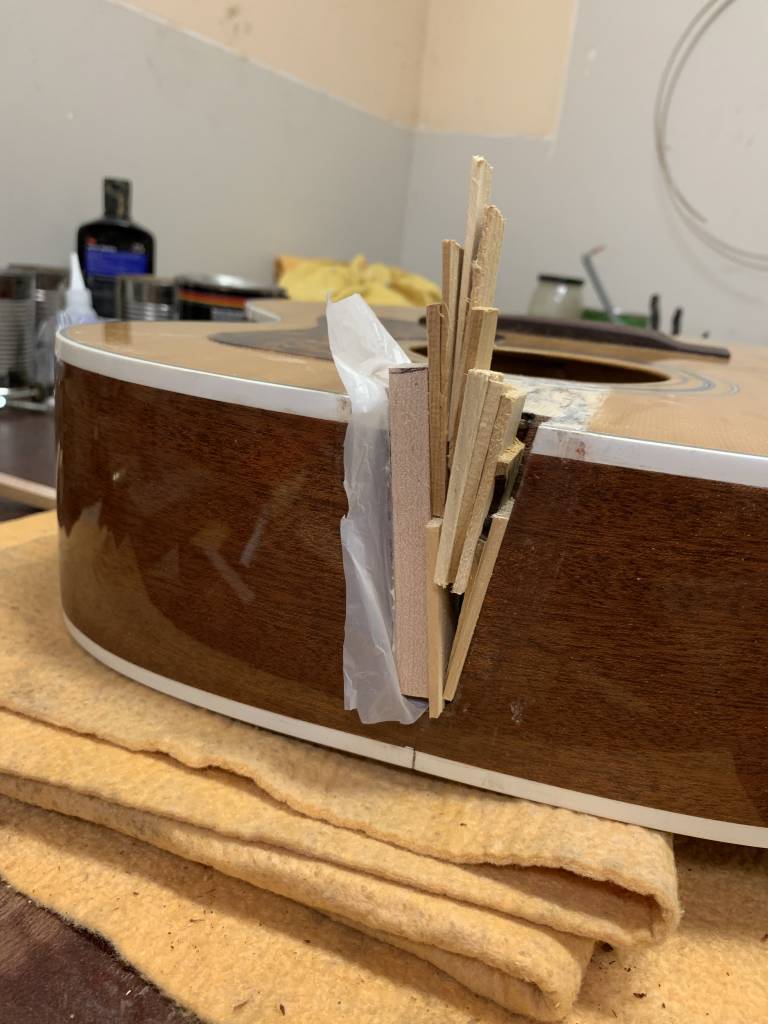
I soon learned that everything I read about Guilds being harder to reset a neck on was correct. After about an hour of moving the rod back and forth, I could feel some very slight movement as though the dovetail had loosened, but the neck would not come loose. Guild in the 70’s and up to as recently as 2013 was finishing the neck and body together. This allowed them to apply glue not just in the dovetail, but between the heel and the face of the sides. That glue was much farther from the heat rods than the dovetail. I began heating up the spatula I had used for the bridge and pickguard removals and attempting to slide it between the heel and the body. This continued for about another hour until I was able to push it all the way to the dovetail extension of the neck heel all the way around. At that point, the neck came loose and slid right out, which is what happens on a proper dovetail joint. Any movement, and the joint is undone. This is what it looked like.
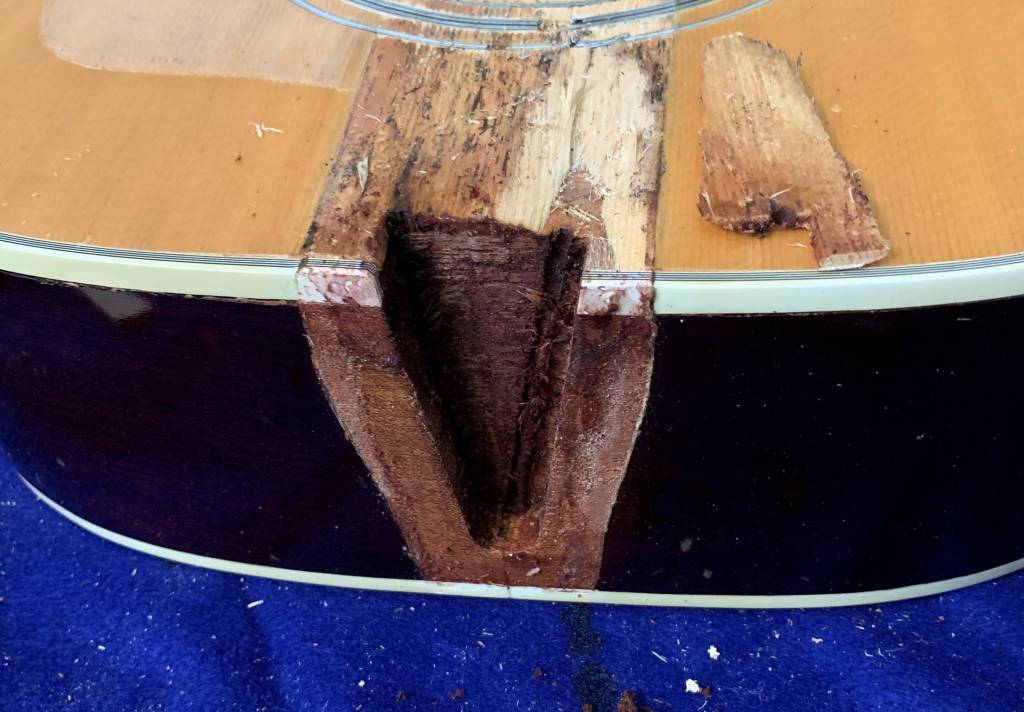
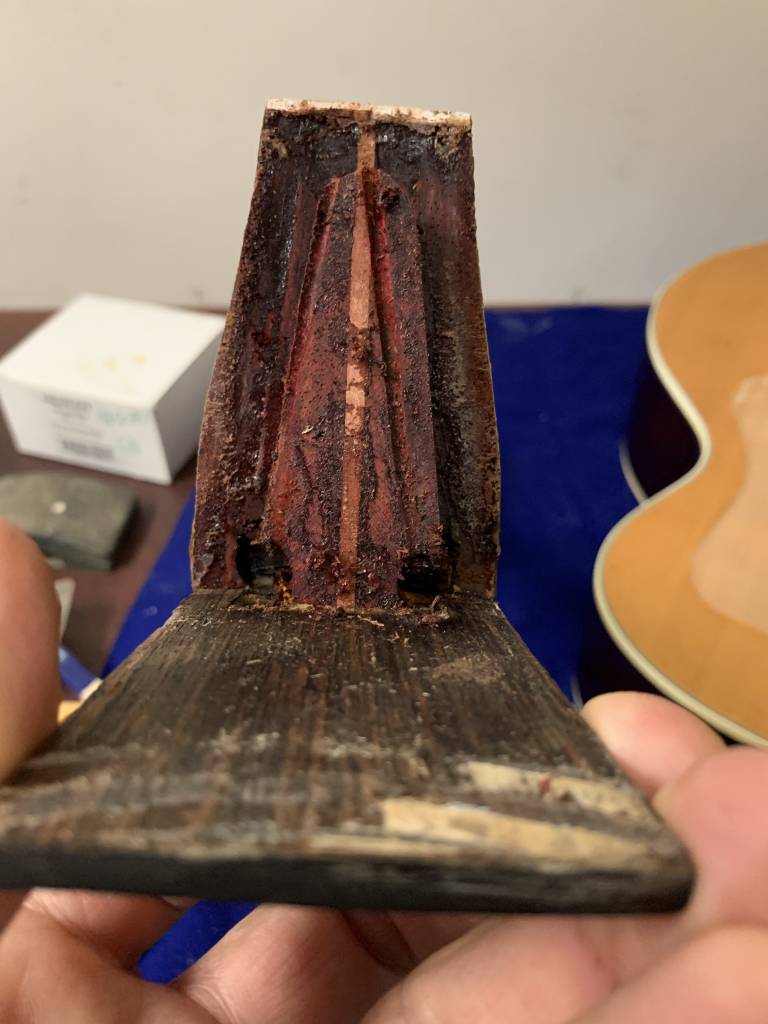
At this point, i made a decision to completely refinish this guitar. The existing finish was not in bad condition, but with the neck removal, pickguard removal, and bridge removal, i would have endless amounts of touchup to do, and i never liked the dark red finish Guild used to use on mahogany. With a complete refinish, I would be able to put the guitar back together the way Guild is building their guitars now, finishing the body and neck separately, and assembling them after all finishing is done. This gives the guitar a cleaner look, and the next time the neck needs reset, it will be much easier to do. This turned out to be a very good thing as you will see. Also, I could finish the top completely and install a new custom pickguard with the 3M double-stick sheet adhesive over the finish, which would prevent the pickguard from pulling on the wood again. This is how Guild and Martin both do it now.
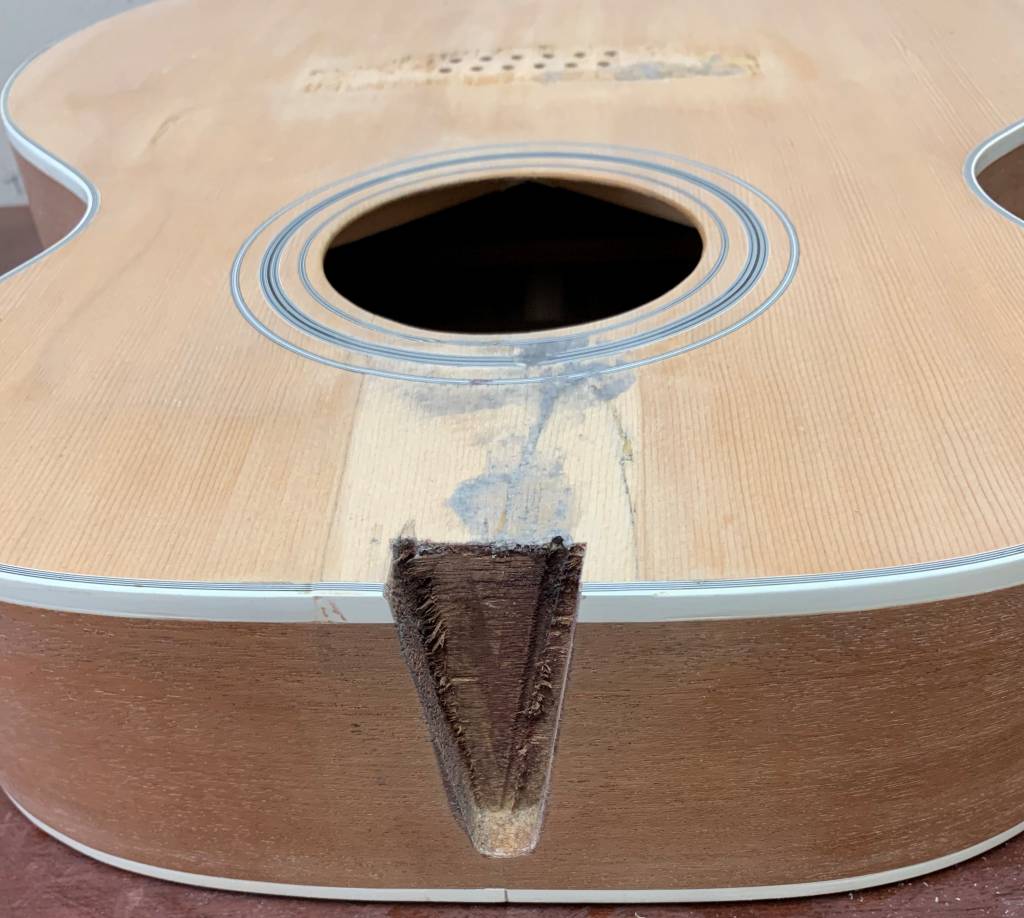
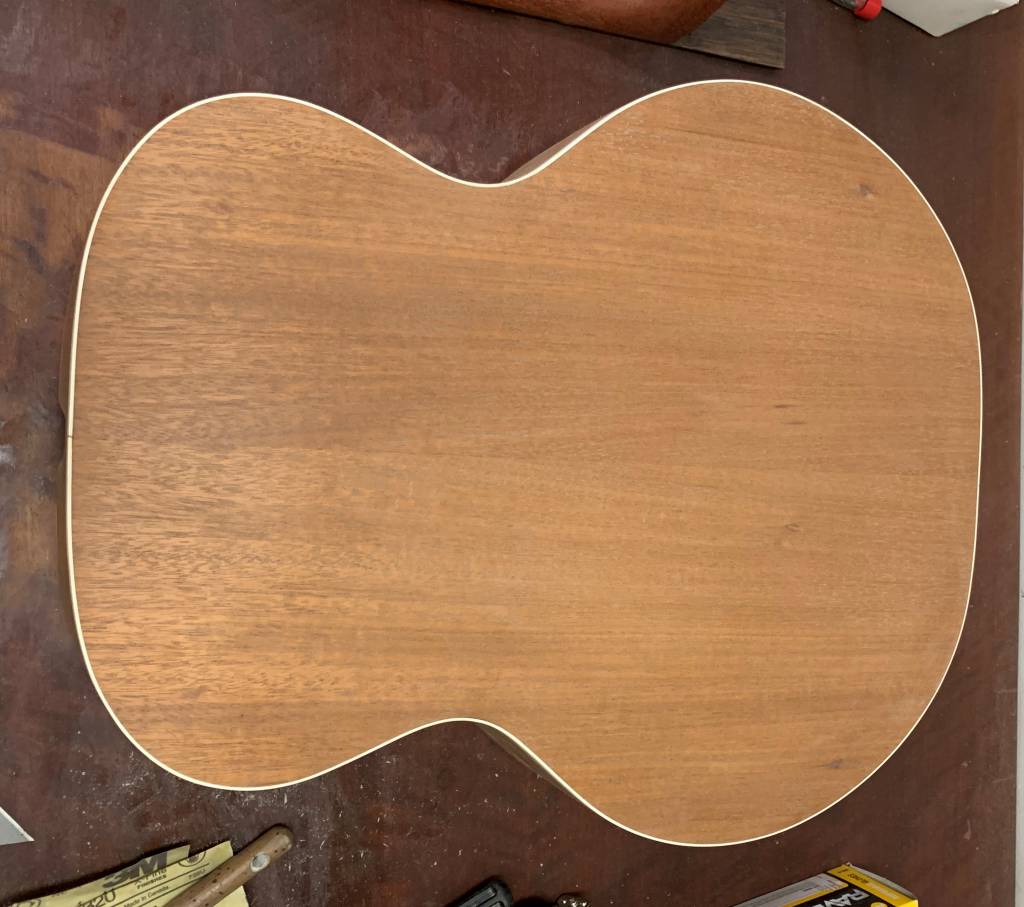
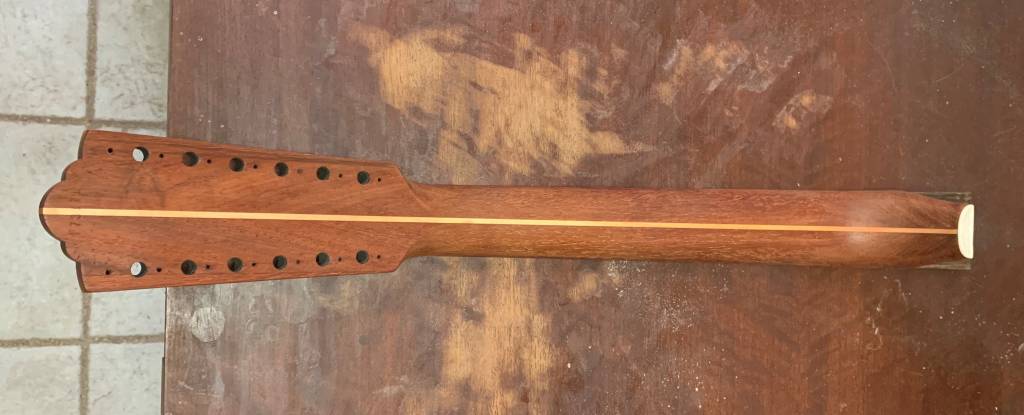
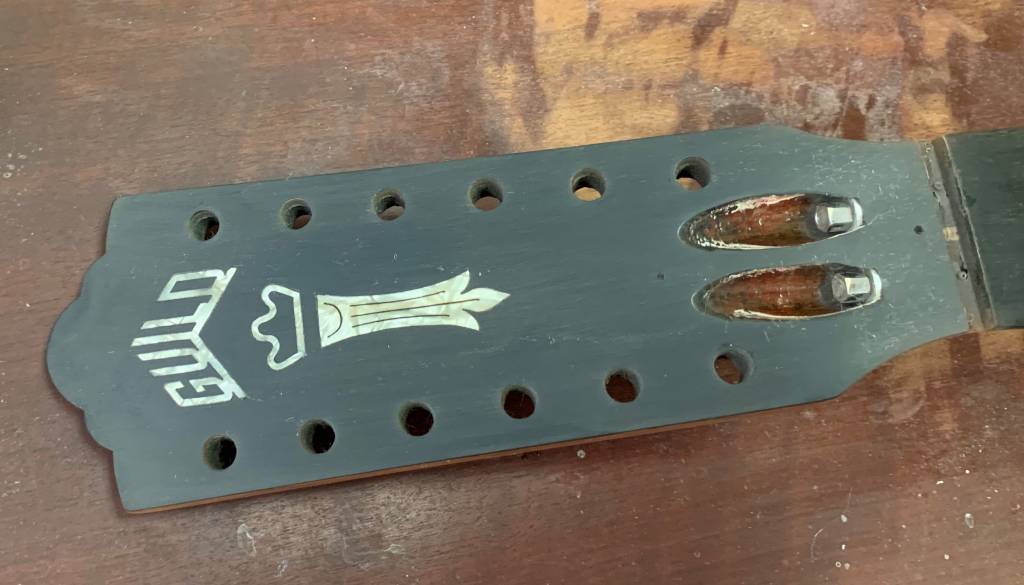
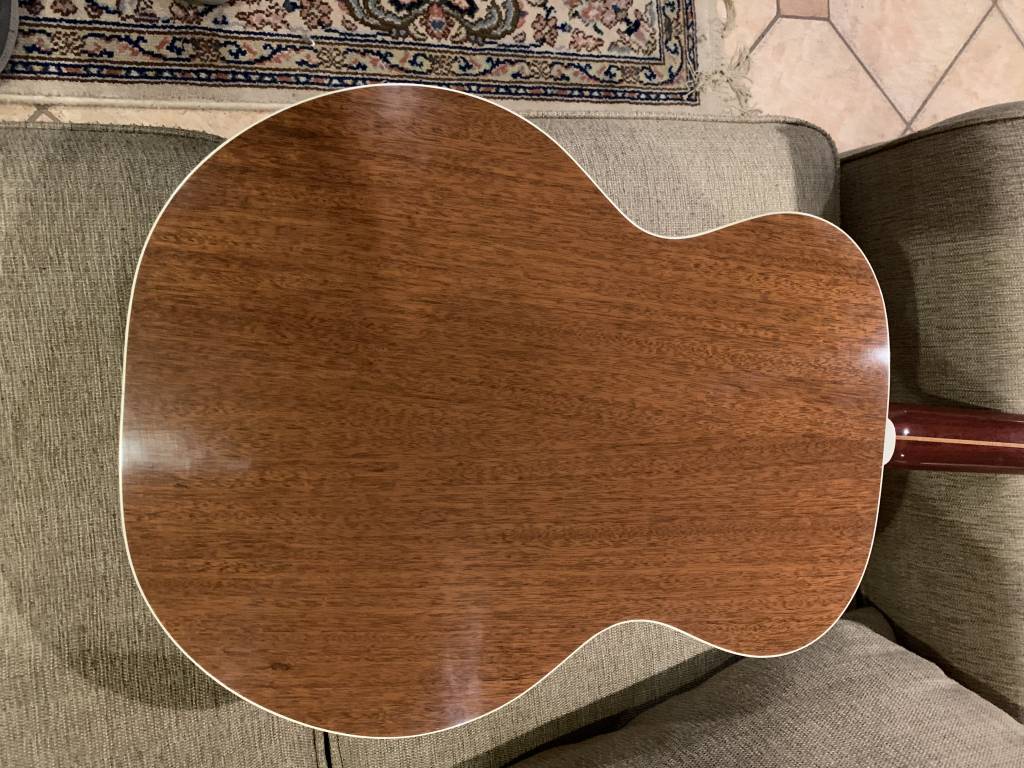
I stained the back and sides a medium brown color, mainly to highlight the grain of the mahogany. The top, neck, and headstock were not stained. The finish was clear Nitrocellulose lacquer.
While the neck was off, I checked the frets for level and height. I decided to completely re-fret this guitar to give it the full benefit of the neck reset. I used a soldering iron to heat each fret before pulling it out with a small fret puller. I actually melted solder on top of each fret as I went to assure that it had been heated sufficiently.
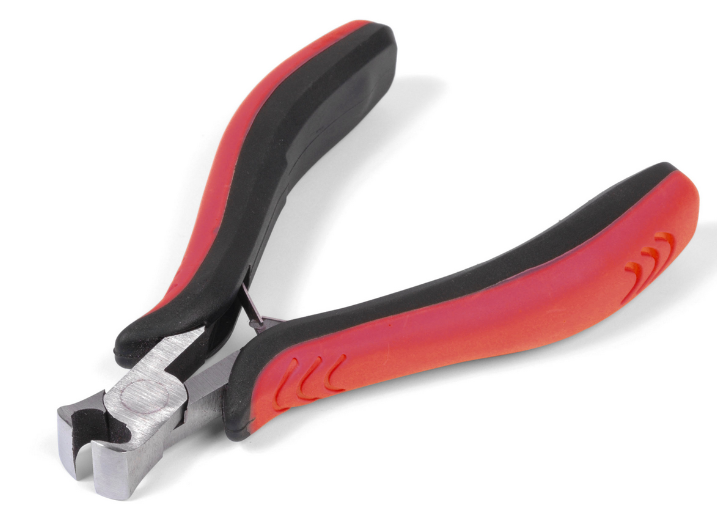
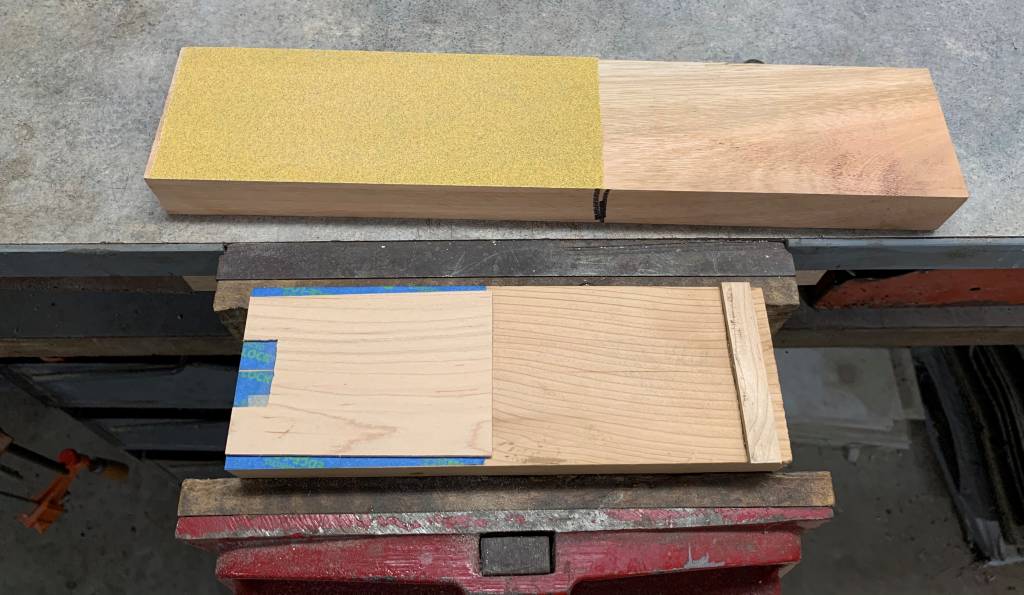
After pulling the frets, I decided to straighten the fretboard, while keeping the radius correct. I cut a cedar block about 10″ x 3″ x 1.5″ to use as a sanding block. I clamped the neck in my woodworker’s vise with a piece of 80 grit sandpaper wrapped tightly around it.I then used this to sand the radius of the neck into one face of the cedar block by running the block over it. I then wrapped 120 grit sandpaper around the block and sanded the fretboard until all the dips and digs were gone. I used a small fret saw to deepen any of the fret slots that were lowered by this process. When I installed the new frets, I used water-thin superglue in each slot to glue them in.
The next step was to cut a new bridge out of the 2.5″ x 7″ x 0.5″ piece of rosewood I had purchased. I decided the best thing to do would be to make an exact duplicate of the existing bridge that would be between 5/16″ and 3/8″ thick. I planed one edge of my blank smooth. I lined the planed edge up with the front edge of the existing bridge and glued the old one on top of the new one with two small drops of superglue. I then drilled all of the bridge pin holes on my drill press using the existing holes as a template. I used a 3/16″ bit. While the two bridges were still glued together, I used a 3/32″ drill bit on the drill press to mark the ends of the saddle slot by drilling through the ends of the slot on the existing bridge and continuing right through my blank.I used those two holes to line up my router with a 3/32″ carbide bit to rout the slot later. Then I used a scribing tool to trace the shape of the existing bridge onto the blank, so I could cut it out later on the band saw. After all the marking and drilling was done, I used a putty knife to separate the existing bridge from the block. I cut the blank to slightly bigger than the scribe of the shape so I would be able to sand it smooth later. I then re-sawed the blank to just over 3/8″ on my table saw, because a planer would have left snipe digs at both ends of the block. I knew the entire top surface was going to be shaped, so the saw marks would not be a problem. I designed and built a simple jig to rout the saddle slot.
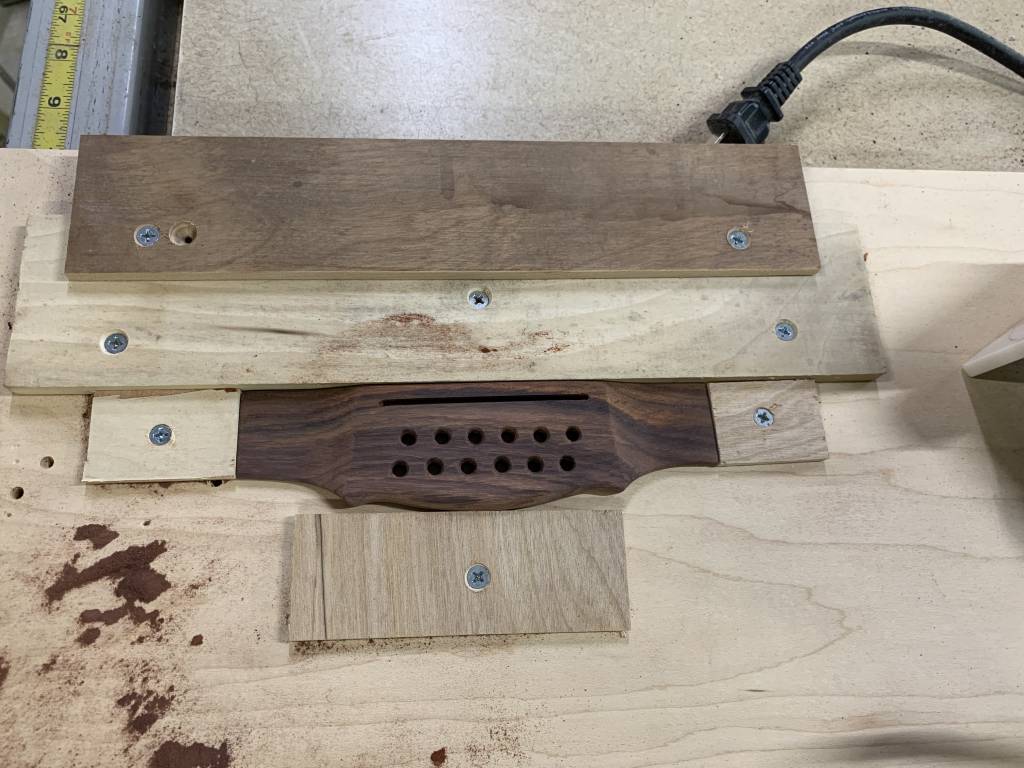
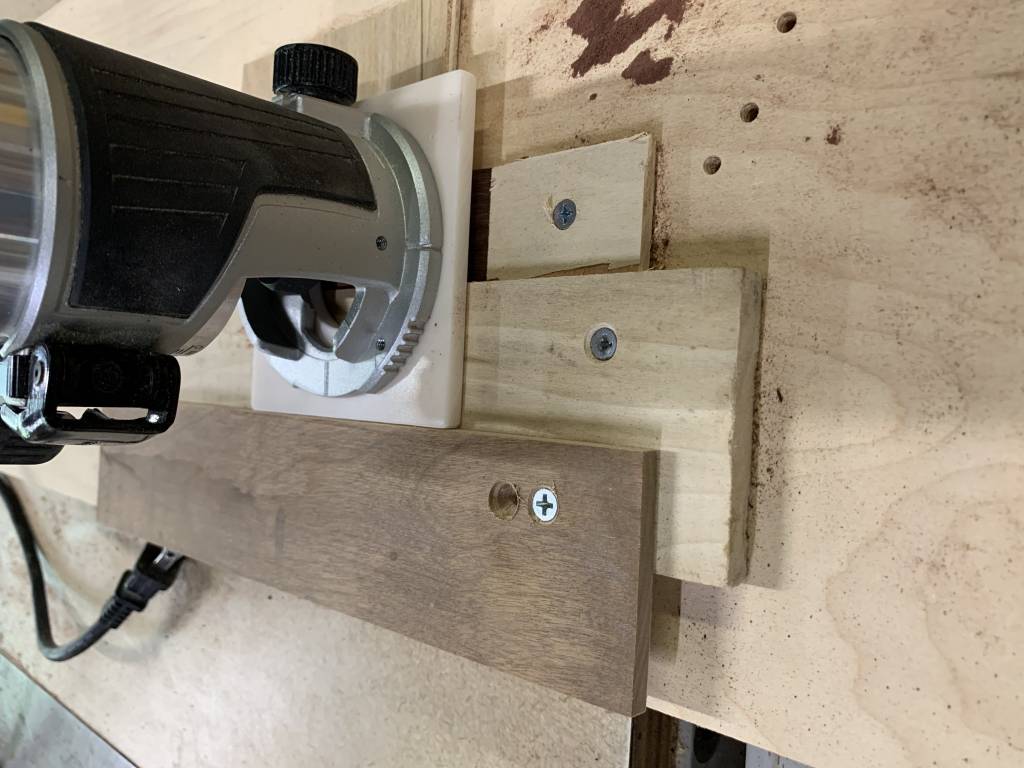
Next, I shaped the top, using a block plane, a file , and some sharp chisels. The final shape looked like this.
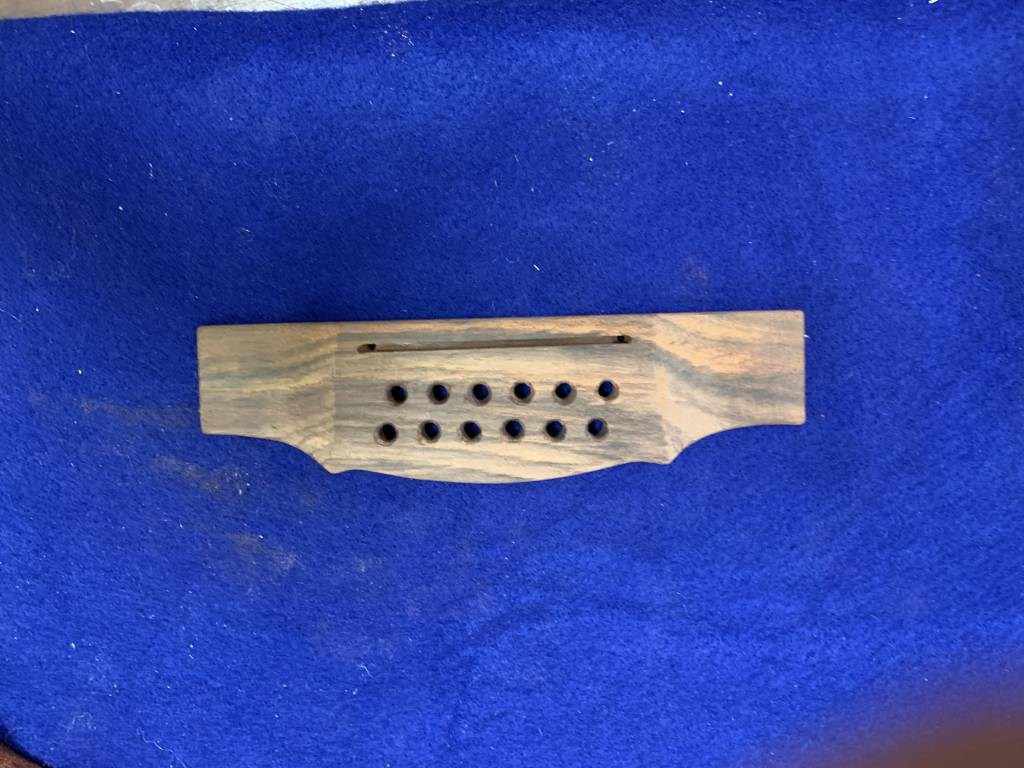
The next step was to change the neck angle. The best way to do this is by sanding the heel so it meets the body at a different angle, while not changing the overall length of the neck. This is done by securing the body in the woodworking vise, positioning the neck in the dovetail pocket, and pulling sandpaper between the heel and the body to sand only from the top of the heel towards the bottom, without removing anything at the very top. The pictures I have that show this process are from another guitar, but the process is the same.
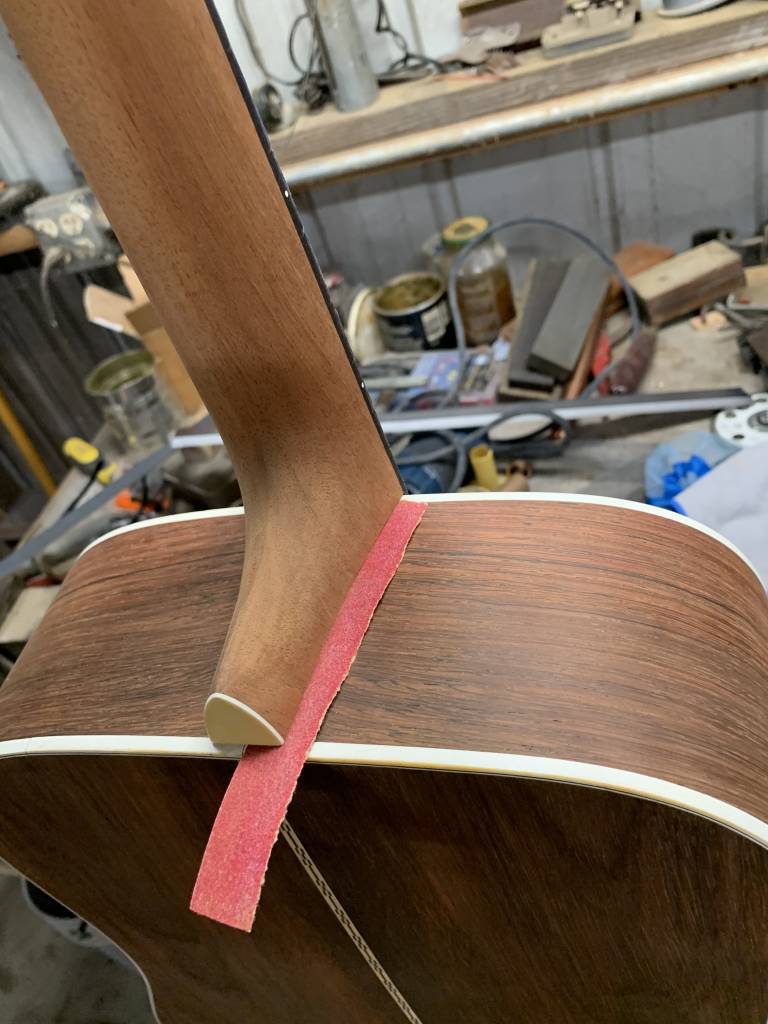
Before beginning the actual sanding, I used a chisel to relieve the face of the neck heel so I would not have to sand so much.
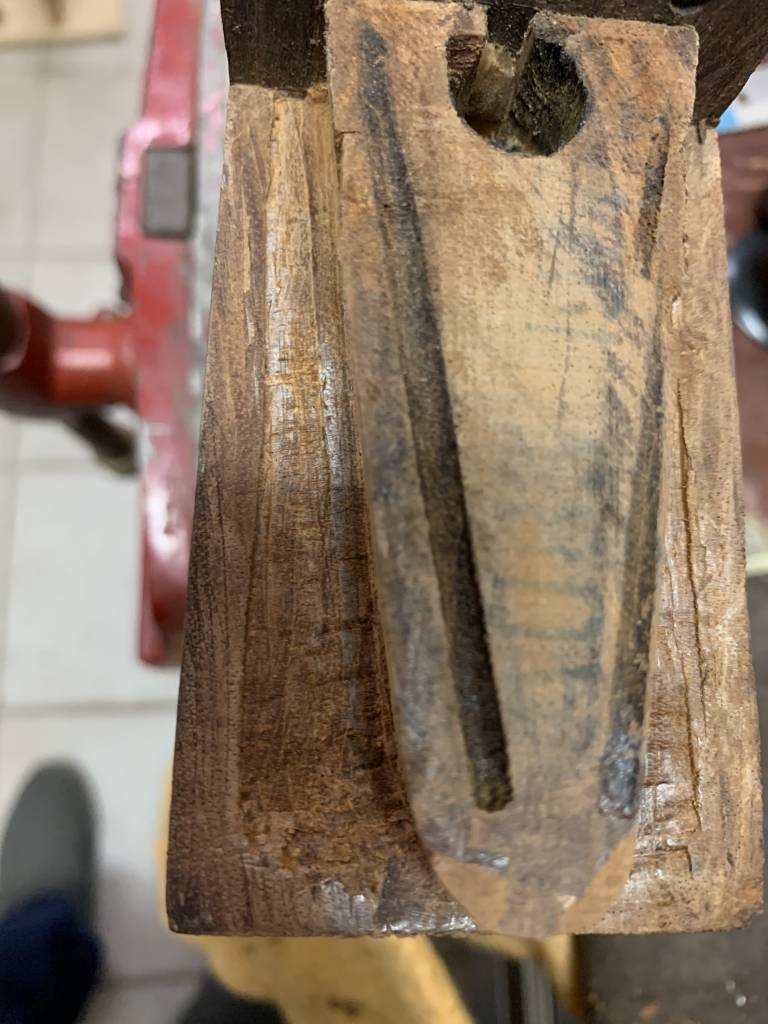
When the fit was good, I moved on to finishing. After the lacquer was done and buffed out, I rechecked the fit with the straight edge and the bridge, which was now glued into place, to make sure nothing had changed, and adjusted as needed.
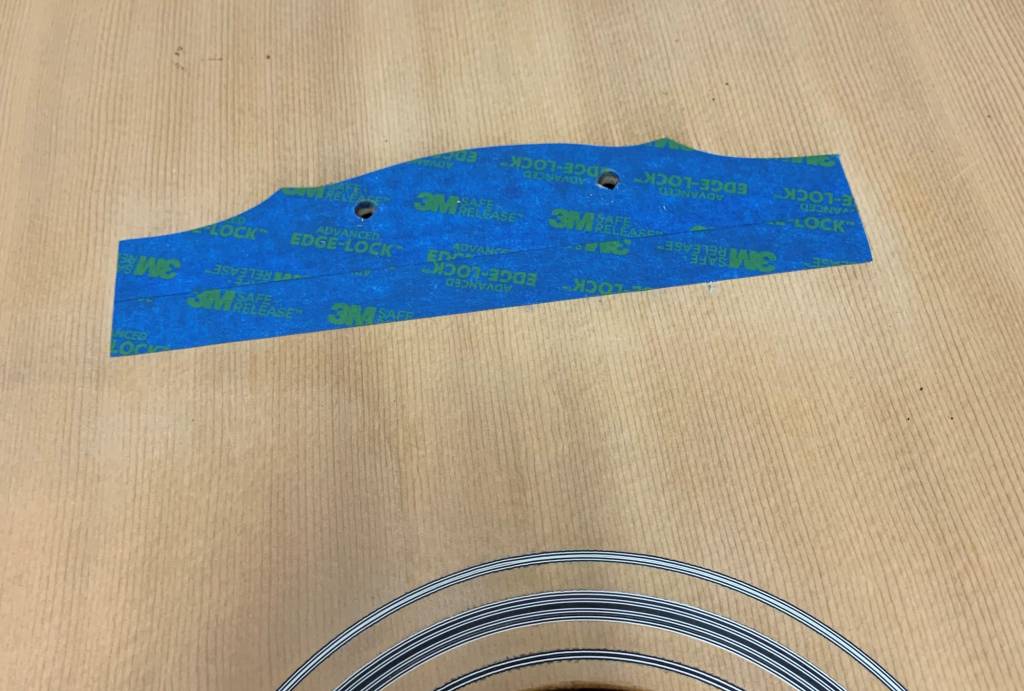
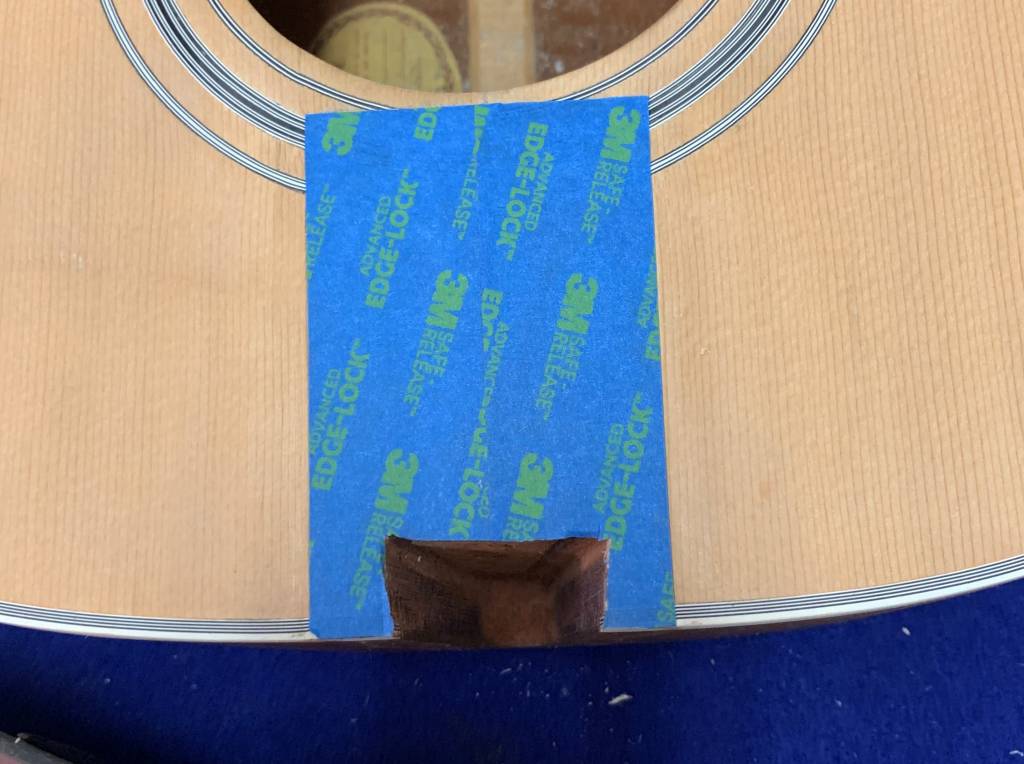
The next step was the finishing process. I used a two step stain and glaze on the mahogany only, leaving the top and the neck natural. I had to very precisely mask off the two areas, where the bridge and the fretboard extension went, so that they could both be glued to raw wood. I used a wide piece of blue tape to cover the bridge area. I then positioned the bridge using the bridge pin holes as a reference, checking with a square to the body. I used machine screws, nuts, and washers through two bridge pin holes to lock the bridge into place. I then used a sharp utility knife to carefully cut the tape using the bridge as a template. I removed the excess, leaving a perfect outline of the bridge in blue tape. Care must be used not to cut into the wood grain when doing this, as that could cause the bridge to lift under string pressure after it was glued in place. I used the same process with fingerboard extension, checking with the straightedge to make sure it was centered on the bridge. There is no room for error here. I took my time.
The lacquer was applied in stages as follows. The first coat was thinned 30% as a sealer. The next two coats were full strength. At this point, I sanded with 220 grit non-loading paper to knock down the raised grain. That was day one. Day two I applied four full strength coats of lacquer and left it to dry over night. The next day I sanded with 220 grit NL paper again, but this time to a uniform filled flat surface. The goal is no gloss left in the pores. Some areas needed a few more coats to achieve this, especially on the Padauk neck. After another overnight, I applied three more “Beauty” coats, which are thinned about 40%. This makes them flow out very nicely, and the guitar almost looks buffed out. At this point, I left the neck and body for about 10 days to let the lacquer fully cure. This makes for much easier final sanding, and the finish won’t shrink afterwards and show “orange peel”.
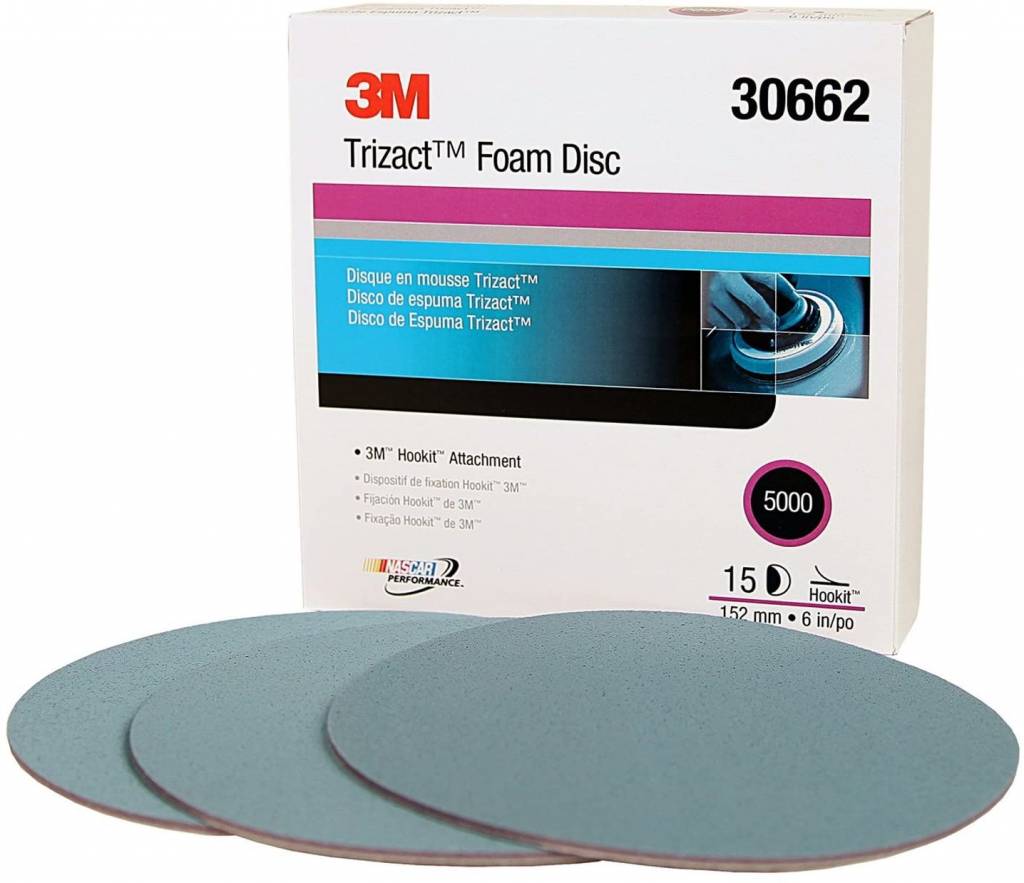
The typical method of final sanding is to use 600 grit wet-dry sandpaper with a block to level the surface of the lacquer and achieve that uniform flat finish. I have used this method in the past, but sandpaper technology has advanced and there are products that can be used dry to get excellent results. 3M Company (Who else?) has a line of foam backed sanding sheets that range from about 320 grit to 1000 grit. They can be used wet or dry, but I use them dry, because any introduction of water to a finished wood surface always seemed like a bad idea to me. The beauty of these sheets is the amazing gloss levels you can get from dry sanding. The nature of the grit feels and acts differently from even the regular high-end 3M wet/dry sandpaper. The sanding scratches are much less pronounced at every grit, and by the time you get to the “Micro-fine” level, you have a gloss. This is from using this stuff by hand, not machine. I finish off with another 3M product called “Trizact” which was developed to process solid surface products to a high gloss used dry. I can get the 5000 grit version locally, but anything above 2000 in “Trizact” would do the trick. At this point, I finish with a 3M automotive rubbing compound by hand with a piece of felt wrapped around an automotive flexible sanding block.
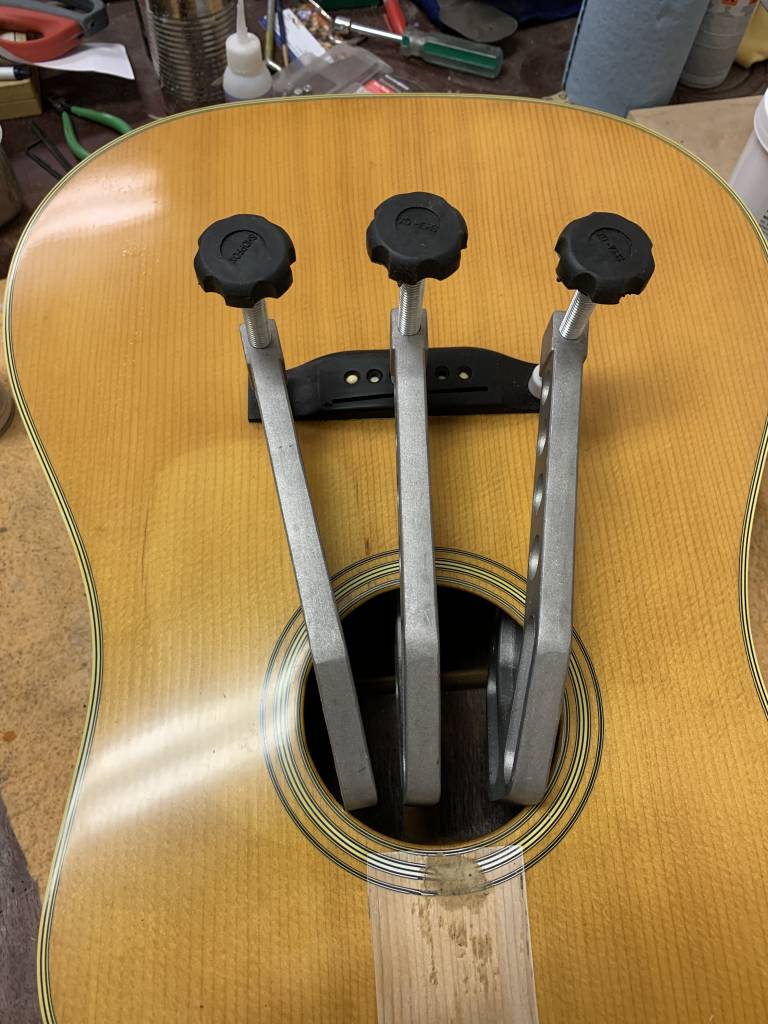
The next step was to install the new bridge. Step one is to carefully remove the tape which is now sealed under the lacquer. I used a very sharp knife to cut through the lacquer to free the tape, taking care not to cut into the wood underneath. After the tape was removed, i applied “Titebond” regular glue to both the top and the bridge with a small brush. Positioning was easy with exact outline. I used a pair of bridge pins to hold it in place until I clamped it. I have 3 long reach aluminum clamps that work great for this. Once they were set, I used a damp white cloth to remove all the glue squeeze-out: easy to do at this point, much harder later.
With the bridge in place, I could now fit the neck dovetail. When all the old glue is removed, and the surfaces on both the pocket and the horn of the dovetail have been scraped clean, the dovetail is quite loose. For the joint to work under string tension, there must be 100% contact between the sides of the pocket and the sides of the dovetail horn on the neck at the exact point where the neck is fully inserted. I have a stock of assorted mahogany shim stock, ranging from .020″ to .045″. In most cases, I can find a shim just big enough that the neck cannot go all the way into the pocket. That shim is glued to the sides of the horn, and then sanded and scraped to an exact fit. On this guitar, shims had been used on both the horn and the pocket at the factory, which made the fit really loose. I needed to glue a second pair of shims to the sides of the pocket to get the fit tight enough to work on.
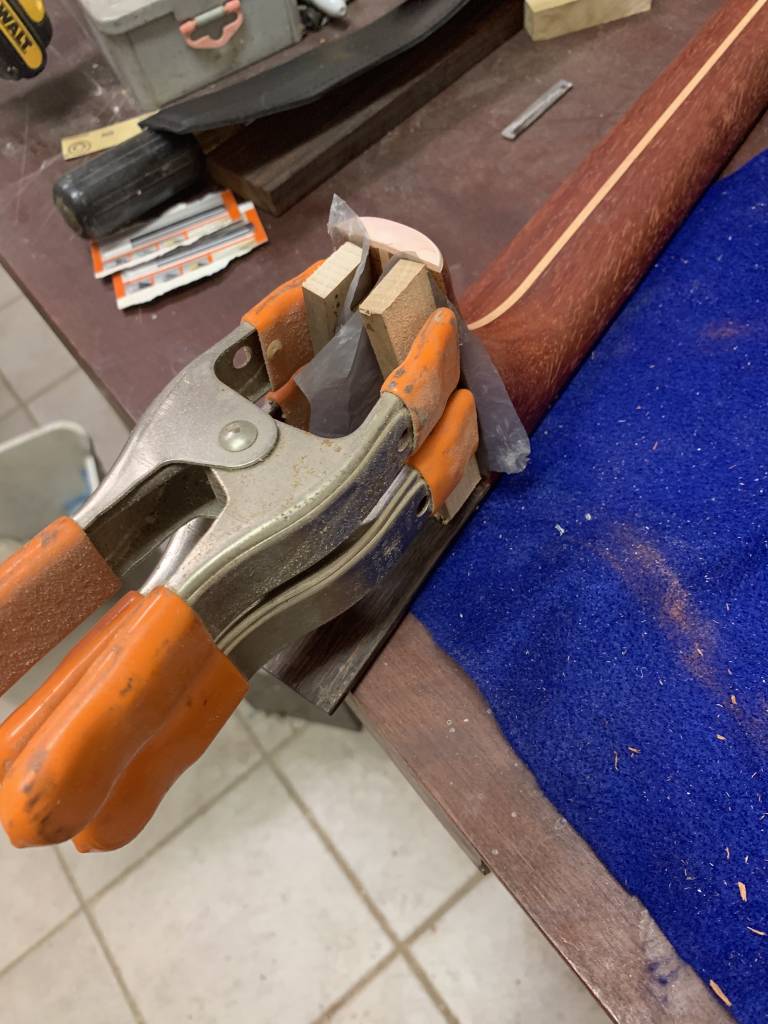
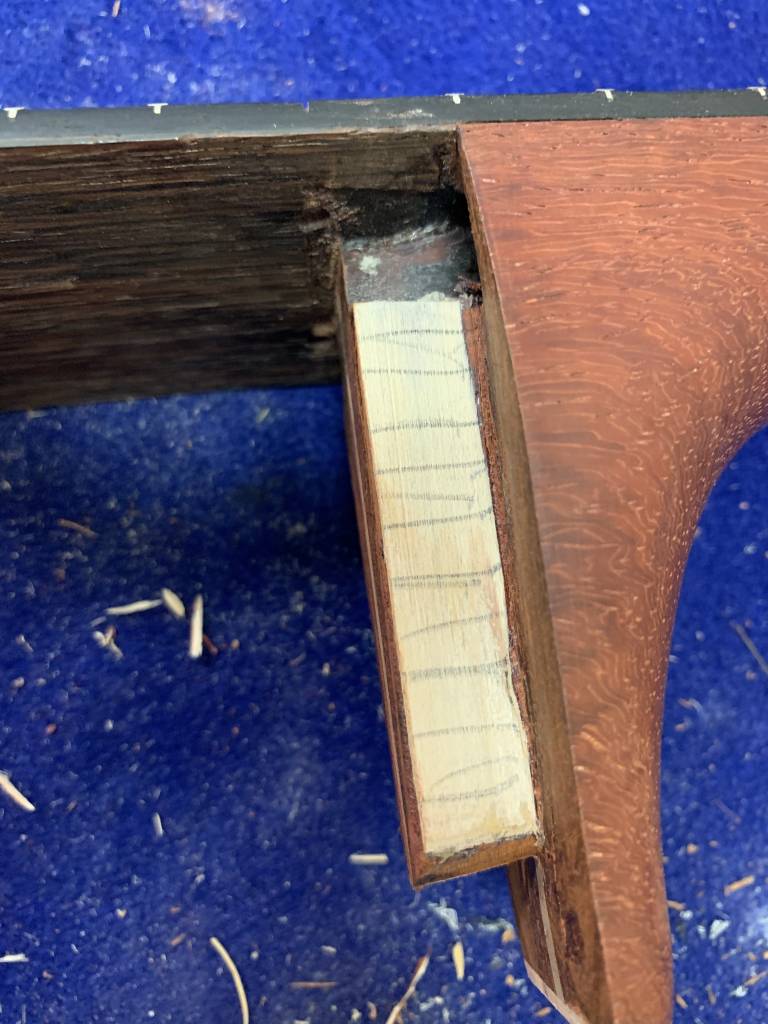
Now when the the neck was assembled to the pocket, it stopped with the fretboard extension about 3/16″ above the top. I used dental indicator paper to show the high spots on the horn, and a very sharp 1/4″ chisel to scrape off only those high spots at each fitting.
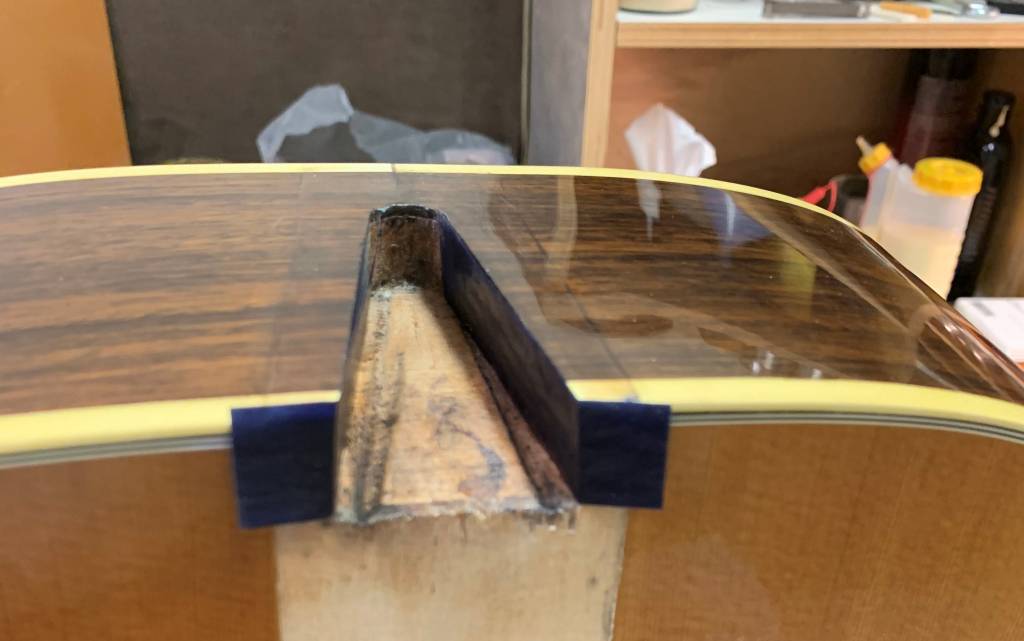
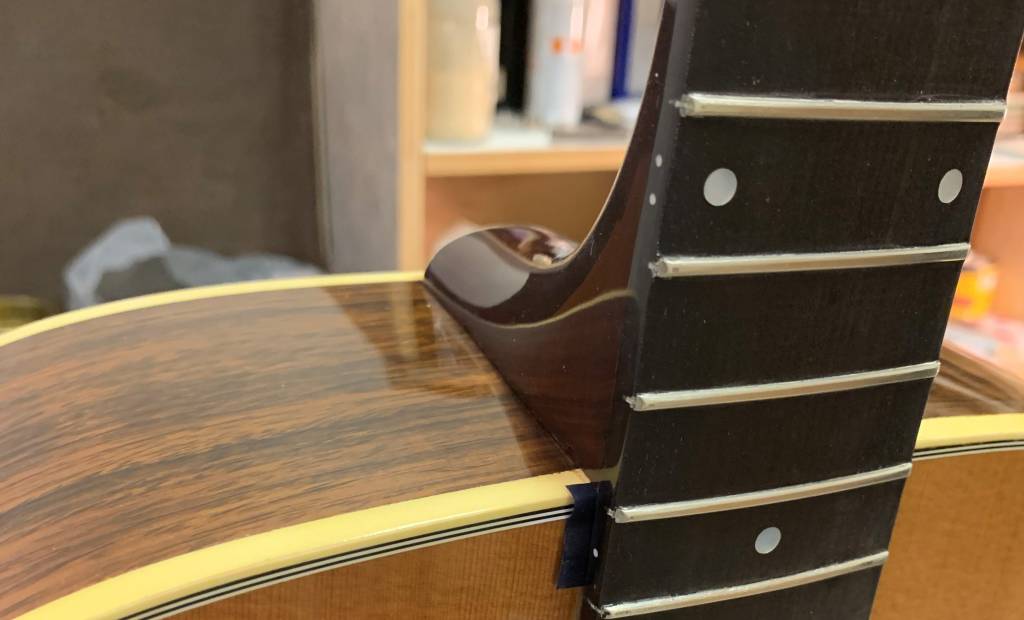
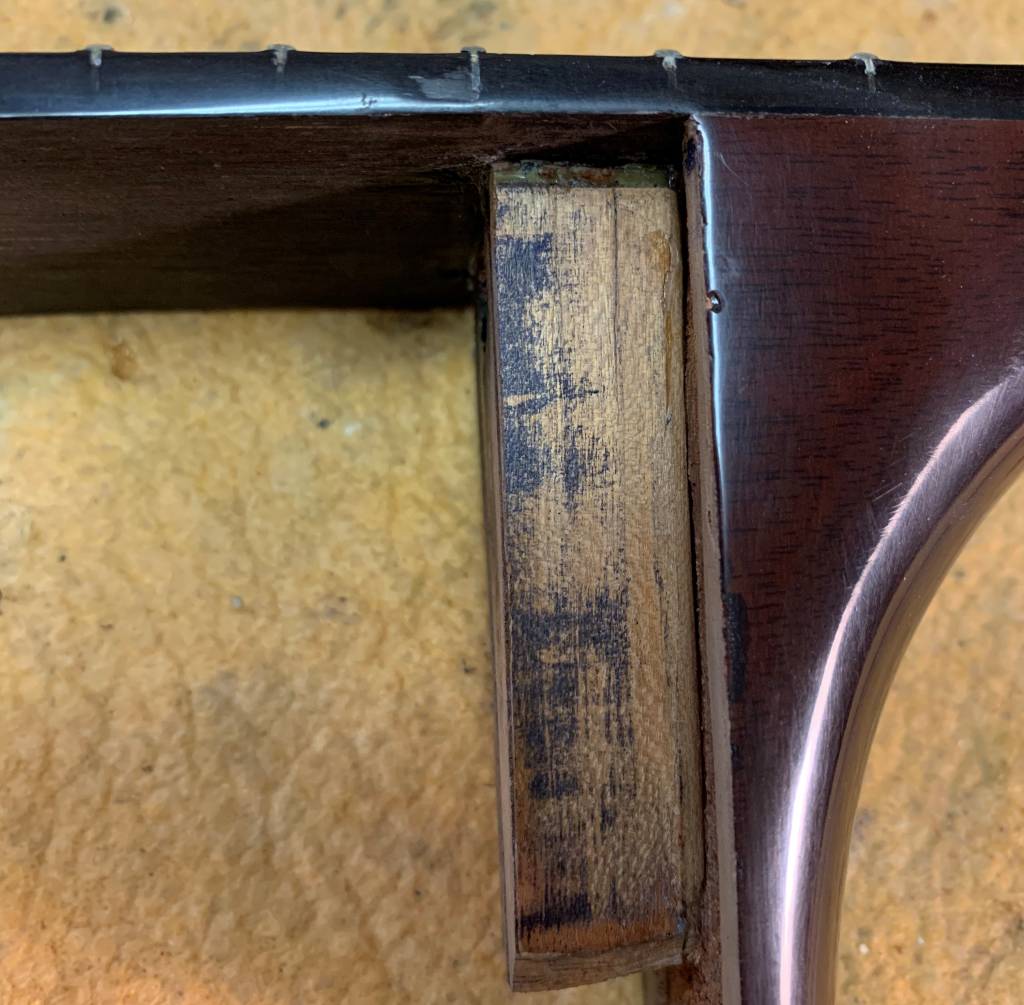
The goal is to have the entire surface turn blue without taking off to much material and ending up having to start all over. I used sandpaper until the fit got close, and then I used the chisel to carefully scrape only the blue marks. I also had to constantly check to make sure the neck was still centered on the bridge, which meant even sanding and scraping on both sides of the horn. When the fit is very close, I put a clamp on it dry to see if it will go into place with moderate pressure. If it does, then I’m done and we are ready for glue. A properly fitted dovetail joint will hold string tension without any glue.
When I got to this point on this guitar, I had one more step to add to the process. Because the change in neck angle was so significant on this guitar, the fretboard extension needed to be shimmed to avoid a severe bend. There was a 1/32″ shim from the factory which I had removed, because it was no longer needed. The new shim had to be the exact size of the fretboard extension, and vary in thickness from zero to 1/16. To do this, I made a sanding jig with a 1/8″ block at one end which was exactly double the length of the shim, which was super-glued to a piece of blue tape at the other end. I made a sanding block that could ride on the 1/8″ block and sand the shim at the other end without sanding the 1/8″ block. When the far end of the shim was paper thin, the fat end measured 1/16″: simple math.
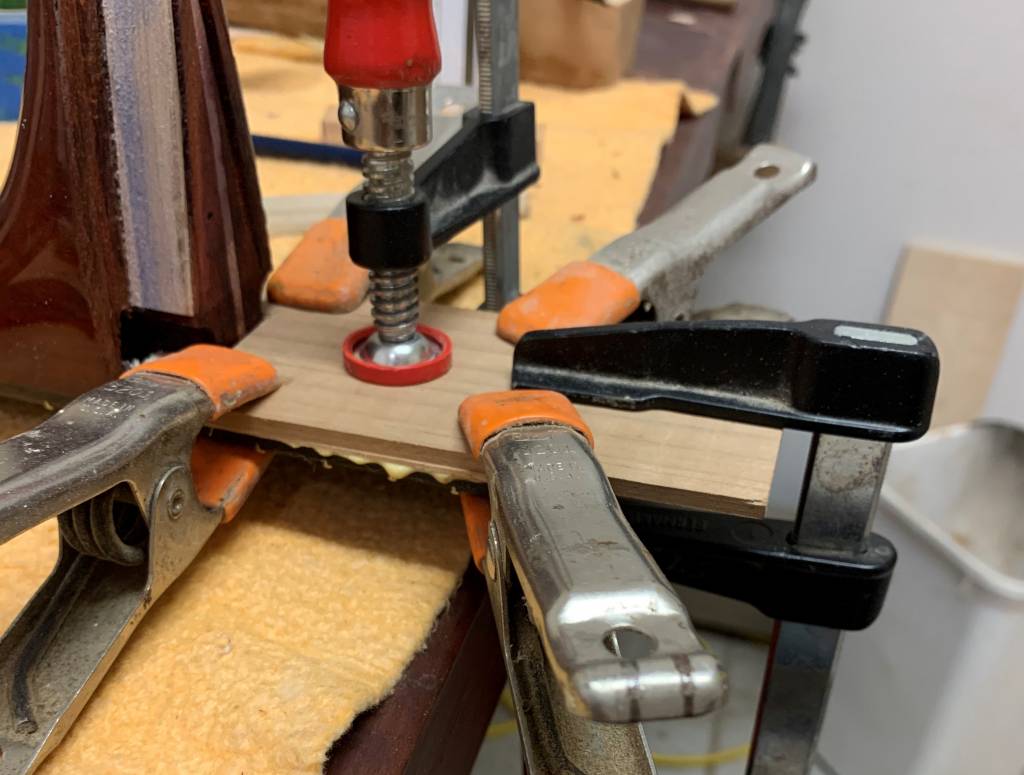
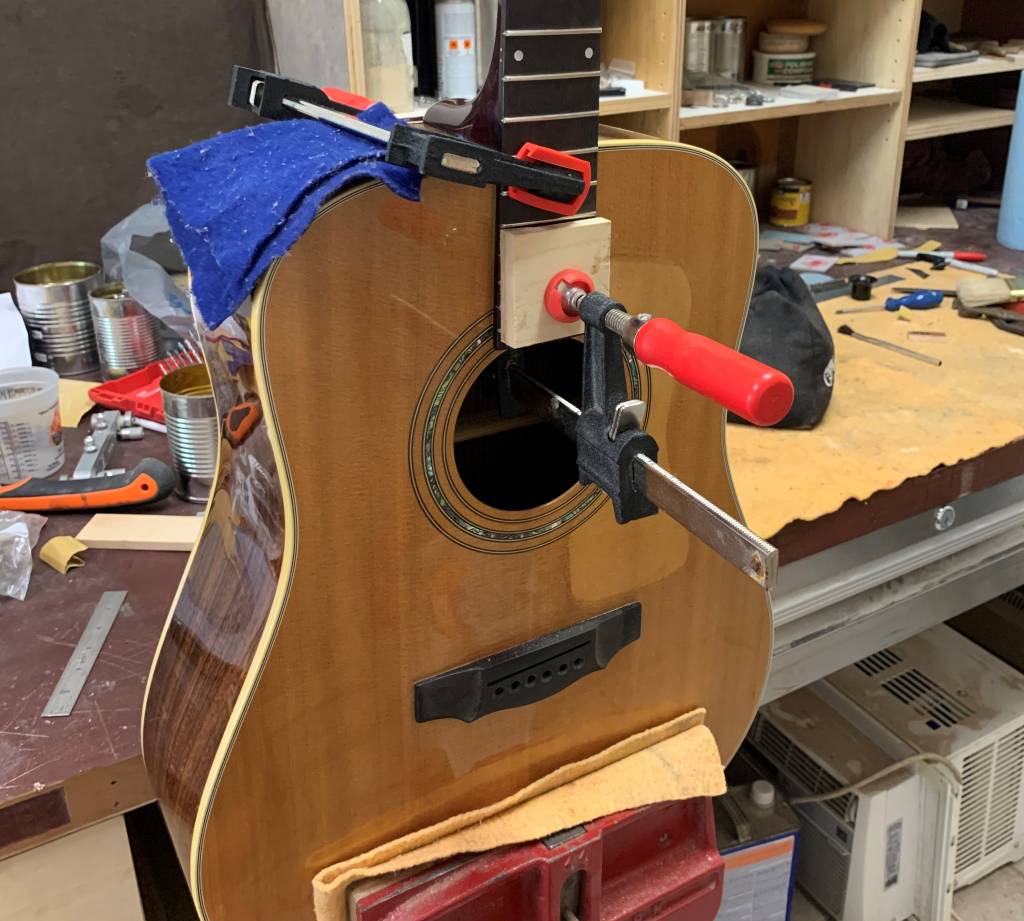
I did one more final check of the neck for for centering on the bridge with the neck clamped dry. This process takes time and cannot be rushed. The actual gluing of the neck is somewhat anti-climactic after everything else is done.
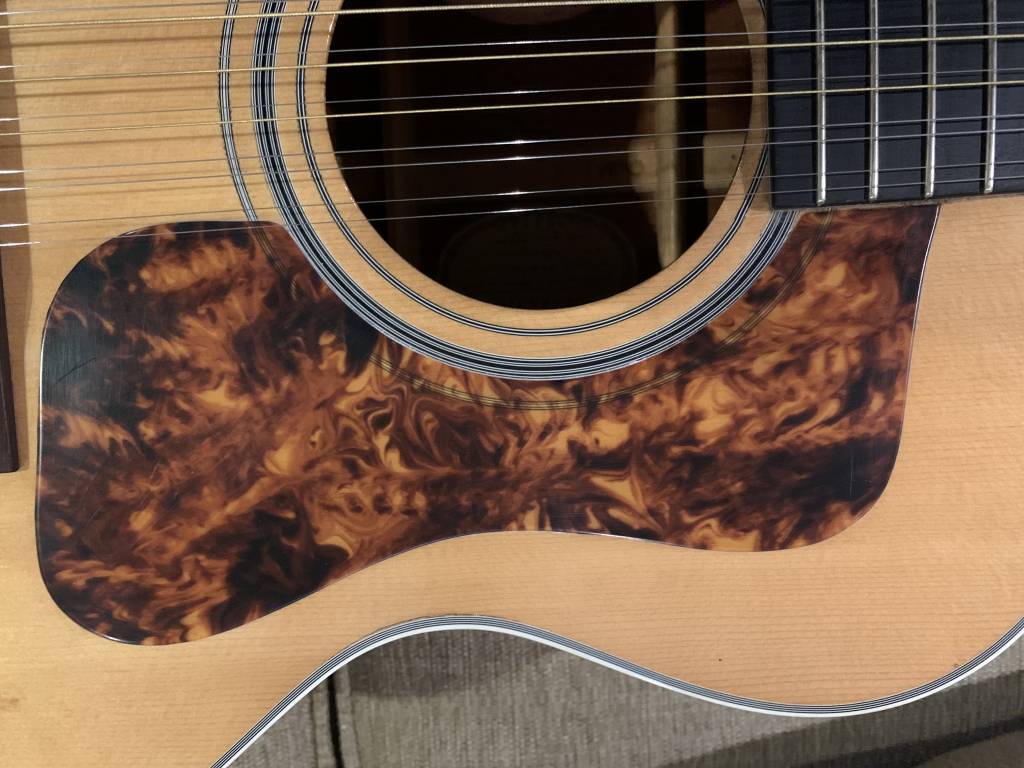
The next step was to make a pickguard . I cut it out of some pickguard material from Luthier’s Mercantile. I beveled the edges and applied a sheet of 3m double stick tape, which i trimmed to the exact size of the guard. It was a simple peel-n-stick operation after that.
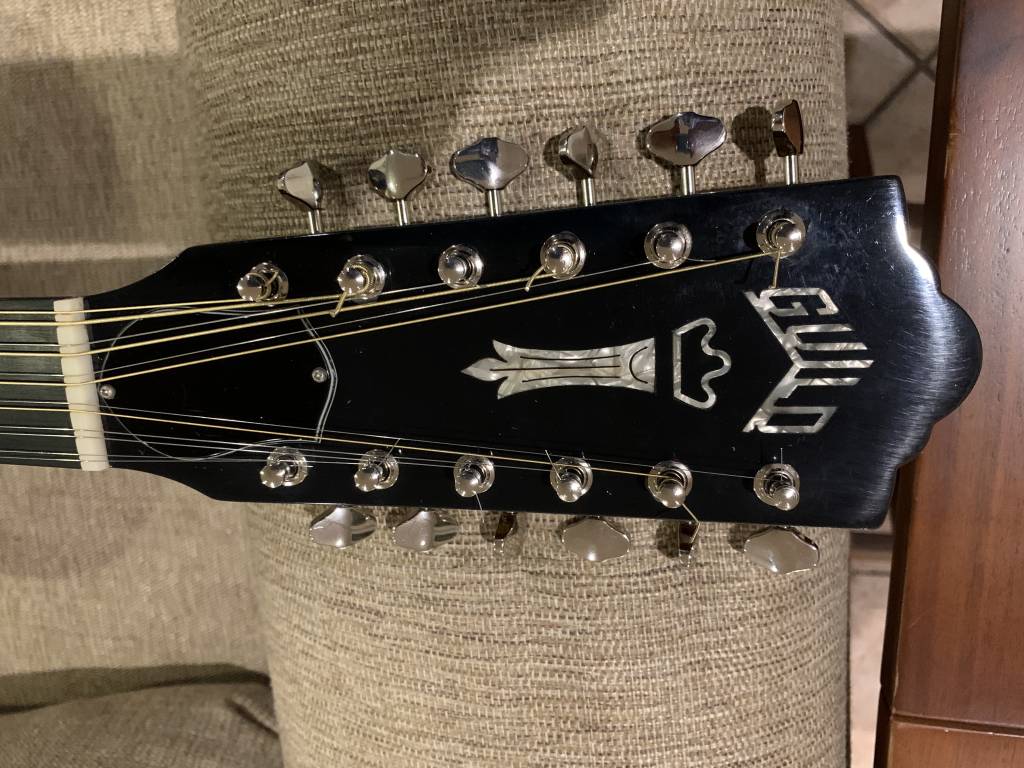
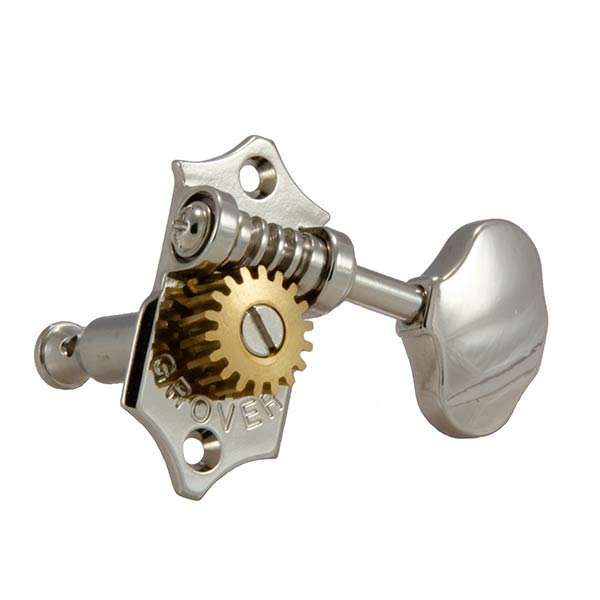
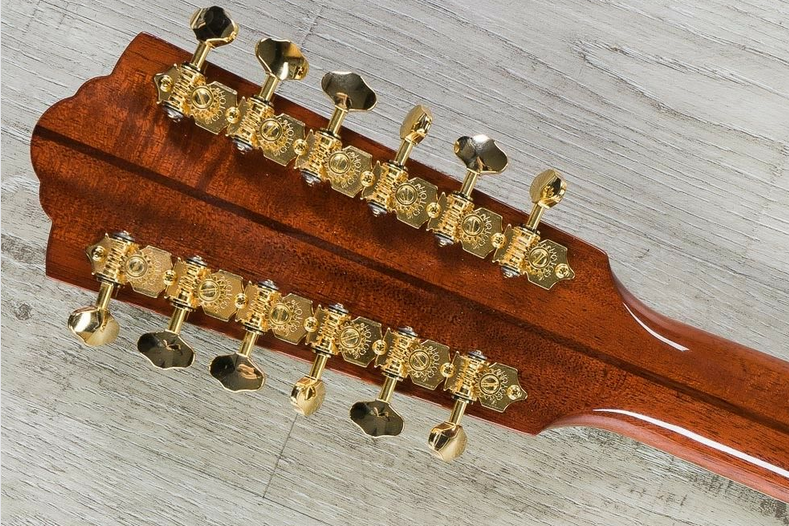
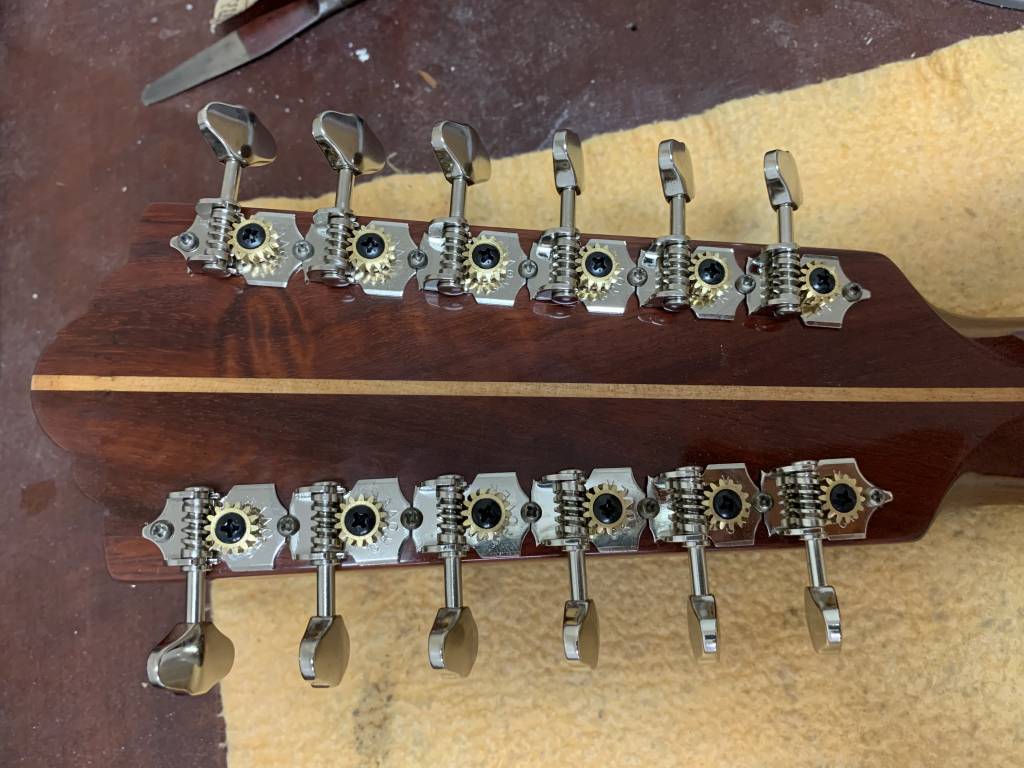
The final step was to replace the original six-on-a-strip tuners, which were very difficult to use. Guild, at their new factory in California, is now using the Gotoh version of the open-gear Grover “Sta-tites”.I looked at several pictures of the new design and did some math. The peg spacing on the originals was 1″ on center. The hole spacing on the “Sta-tites” was 1″ on center. The tuners Guild is using now are proprietary, and not available for purchase. I came up with a solution which I will try to illustrate here.
This is a Grover “Sta-tite”
Here is a picture of the new Guild F-512 tuners.
Here is a picture of the regular “Sta-tites” after I clipped the ends and installed them on this 1973 instrument.
Here are some finished guitar pictures.
